Stamping White Dots With The End Of A Pencil Eraser Onto Your Mixed Media Collage

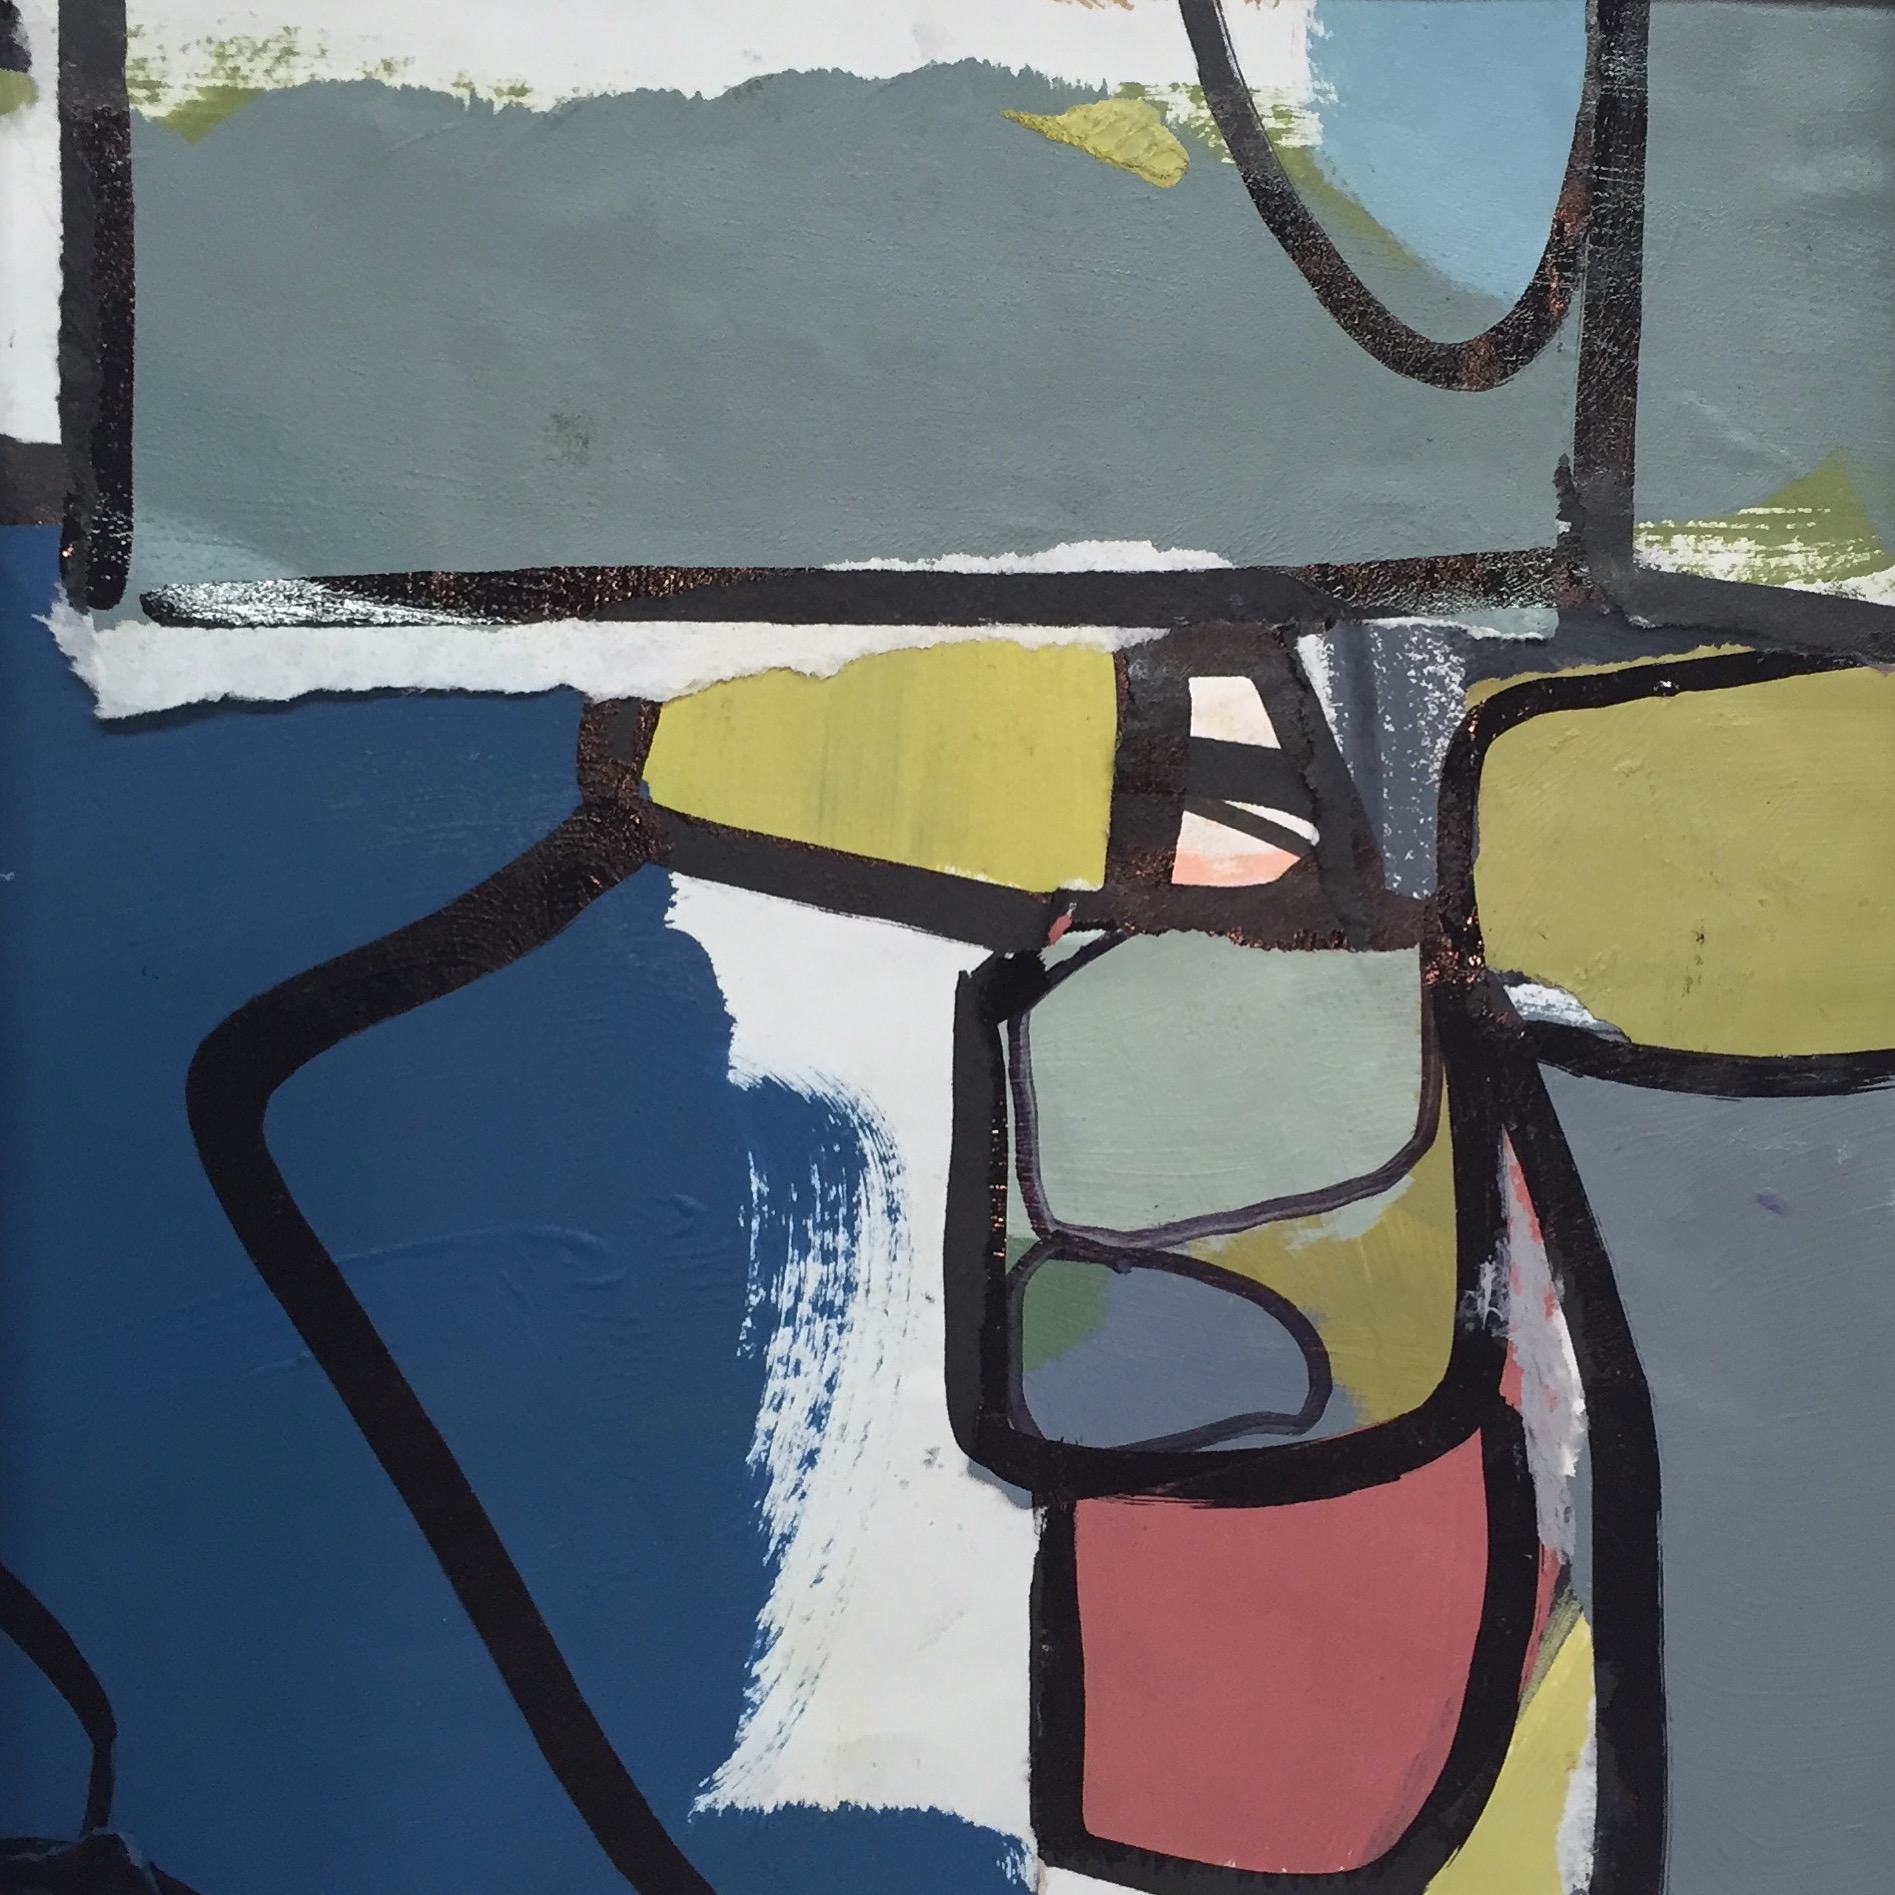
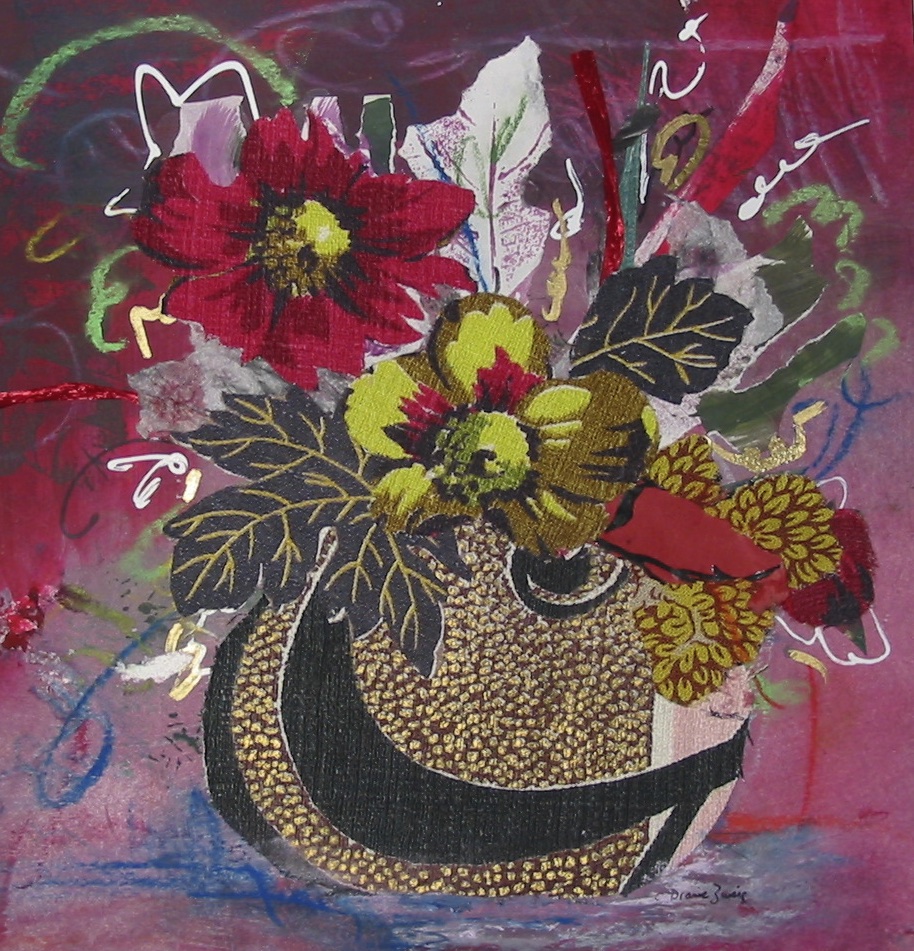
Mixed Media artists simply cannot look at an ordinary object in the same way as the rest of the world. For example, to the average person, a pencil with an eraser is a writing or drawing tool with the graphite end taking top billing. To a Mixed media artist, the rubber tip of a pencil is so much more than a device to eliminate unwanted marks. Case in point, (no pun intended), Lynn Gall an accomplished Mixed Media artist taught me how to use the eraser end of a pencil to stamp perfect dots or circular shapes into a painted or collaged piece. You can dip the eraser in any color, but dipping the eraser into white paint really adds highlights to your work.  

Artwork by Lynn Gall  http://www.lynngall.com/

Painting Laundry Dryer Sheets With Acrylic Paint To Use As Texture In Mixed Media Collage

_MG_0962.JPG

 Do you  know how excited I was to "inherit"  this plastic covered cardboard support I used for painting laundry dryer clothes (the things you use for softening clothes in the dryer) ? I didn't exactly "inherit" the thing, it was given to me when my friend Lynn Gall downsized her art studio as she left for a very long stay Abroad. So when you want to add texture to a Mixed media collage you paint these fabric softener sheets, let them dry and incorporate them in your pieces!  Thanks Lynn  for teaching me about this technique, it's one way to get me to do laundry! Visit Lynn at http://www.lynngall.com/

Pouring, Drawing And Dribbling Black Ink Or Paint In Mixed Media Collage

_MG_1009.JPG

 Drawing with permanent ink, especially black ink seems so scary for many people, cause it seems so , well you know....permanent!  The fear is that it might smudge, flow too heavy, take a wrong turn when applied etc. And those are all the reasons, I like "drawing with black ink" and adding ink to my Mixed Media collages. I find the process of "playing" with ink liberating. There are many ways to apply ink, sometimes I go for broke, and just pour the ink or black paint right on the paper holding the bottle up high and letting the ink land on the paper.  Oh yes sometimes "accidents" happen, and that is what  usually makes my pieces special.

Let Loose With Creative Aging: New Visual Arts Program for Older Adults at The West Hartford Art League This Fall 2016

Throughout the country, especially in larger cities, older adults are finding more and more programs geared for their special needs. While I have many friends who are artists and in their eighties, with more energy and mobility than plenty of people half their age, there are plenty of older adults who need a jumpstart to leave their homes and make art! With this in mind, I developed a brand new program at The West Hartford Art League in West Hartford, CT geared for adults who may be returning to art after many decades or who finally want to try their hand at something new. My new class "Let Loose With Creative Aging" will run Wednesday mornings at the WHAL. Some unique aspects of this class is that caregivers can accompany  participants to class and that individuals with early dementia can feel comfortable attending.   For more information see http://www.cdiannezweig.com/workshops/

Making Your Mark in Contemporary Art: New Fall Class West Hartford Art League

Scribbling seems so easy when you are a toddler and you just let yourself draw freely without any conscious thoughts about what you are doing. Fast forward to being an adult and all of a sudden you can't move your hand without overthinking your modus operandi. Am I making lines too soft, too long, too dark, too crooked? You get the drill, mark making becomes tedious instead of relaxed and free. Don't get me wrong, sometimes you want a very careful deliberate line or mark, but more often than not for abstract artists, making marks is a very spontaneous process. So with this concept in mind, I have developed my newest art class  "MAKING YOUR MARK IN CONTEMPORARY ART"  which will run at The West Hartford Art League this Fall on Wednesday afternoons. Here is the link for more information http://www.cdiannezweig.com/workshops/  

Spice Up Your Cool Colors In A Mixed Media Collage With A Touch Of Pink

Like so many other artists, I seem to have my favorite palette when I am either painting or creating Mixed Media Abstract collages. A fan of the colors of the 1950s, I'm just not happy unless I have done a piece with a fair amount of turquoise, chartreuse, grey and of course some mixture which includes one of my favorites...Payne's grey along with whatever blue is hanging around on my paint table. It is really hard for me to reach for the warmer colors, but adding an accent of red, or orange or pink is so critical when you need to spice up a piece!  

Oil Based Permanent Ink Chunky Paint Pen by Sharpie Great Product For Mark Making

 I am hooked on Sharpie pens for mark making. But every time I think that I own every single black permanent marker made, I discover yet another gem from this company. My newest art "toy" is a big fat chunky oil based black paint pen marker  with permanent ink. Favorites among graffiti artists this product creates a shiny thick line which appears to cover over almost all over media. You get started by shaking the paint pen and then once you remove the cover, you are good to go and can make gorgeous black marks to your heart's content. As you can see, I have really "broken in my Sharpie paint pen. 

Organizing Mixed Media Collages With Circular Shapes

There are many ways to organize a Mixed Media abstract collage. One way is to repeat shapes such as circles, squares, triangles etc. The trick is to come up with different versions of circular shapes that don't scream "I am a circle". What you want to achieve is the essence of the shape which might include a sense of movement, direction, orientation etc. It takes awhile to learn how to "sink" a shape so that it does not look like it is sitting smack on top of a piece of work. You can paint over  your "circle" or use only a partial "circle" or vary the sizes of your circular shapes.


A Noisy Summer Inspires Cityscape Collages

A few summers ago they were doing construction work in front of my studio and the machinery was reminding me of visits to New York City, where noise is always in the background. I found myself having a very difficult time working as my sensitive brain was feeling on overload. That summer, I channeled the "noise" of the construction into cityscapes. The black lines suggest rooftops and buildings. I particularly like the piece of paper which reminds one of bricks. That was accomplished by stamping with the backside of a broken floor tile which had raised ridges which created that pattern.  

Mixed Media Collage Using Vintage Barkcloth

This retro inspired Mixed media Collage combines, acrylic paint, paint pens, scraps of vintage barkcloth fabric and pastels. The first step in this project was to paint a background using watered down acrylic paint. Next i created my floral arrangement using lots of scraps from different remnants of fabric. My favorite part was adding the marks with a white paint pen and pastels. Most of my work is abstract, so it always amazes my friends that every now and then, I create something that looks like something recognizable! This is part of a series of six very different arrangements  which I had a lot of fun with.


Let Loose With Collage & Mixed Media: Spring Workshops at Dick Blick, Plainville, CT

UPCOMING SPRING CLASSES

Contemporary Mixed Media-Collage at Dick Blick Plainville CT.  MAY 2016

Let Loose With Collage & Mixed Media: Leave your inner critic home and join others in the art of creating Mixed Media artwork and collages using painted papers, print making techniques, textures, mark making, dry and wet media.  Emphasis on helping students “loosen up” and work more spontaneously with a variety of art materials and products. All levels of students welcomed.  Day/Time: 4 sessions on Wednesdays 1:00 - 3:00, May 4,11,18, 25. Fee $120.00.

image001.png

Material List

The beauty of Mixed Media collage is that you can use every thing and the kitchen sink  in the process of making art. While I have my favorite products, you are welcome  to bring to class what you already have and to build materials and supplies as you discover new ideas. My favorite essential materials are Canson Drawing paper ()or similar) in a gummed pad (any size works); Acrylic paint; brushes of different sizes; Sharpie Markers; Crayons; oil pastels. Other materials to collect and bring include products that can make textures such as mesh bags from onions, bubble wrap, corrugated  brown packing paper that have different kinds of ridges, wallpaper that has raised texture, combs, inserts from candy boxes that have patterns and interesting surfaces etc. BTW, I also smear paint with old glossy post cards or card board that i fold to size. We will discuss adhesives in the first class.  http://www.cdiannezweig.com/workshops/

The Aftermath of The Painting Storm: A Mixed Media Blessing

Right now I am in my studio struggling with a HUGE painting I am working on. I'm out of my comfort zone and wondering just how many layers of paint this piece can take before the painting weeps in agony. (Or maybe it is just me weeping in agony). The ability to stick with a project through thick and thin (no pun intended) took me years to learn. At certain points I have actually "attacked" my painting in a frenzy of heightened frustration. After all, if you are at your wits end, why not go ahead and "ruin it" ! Interestingly enough, some great things happen after these painting storms. The splashes of paint, the drips, the bold strokes seem to add just the right touches to reawaken a piece that was previously viewed as hopeless and that we wonder if we should kiss goodbye.     

Black And White Abstract Design Using a Uniball Vision Pen On Paper

IMG_8056.JPG

Long before I developed my comfort level with "real" art supplies, I would "doodle" on my lap using a black waterproof Uniball Vision pen. One day, while on an interview (art related), the Director who was was meeting with me said I needed to call my work "Pen and Ink" and graduate to "real" products such as special ink pens and better paper. Ha ha, now almost a decade later, I am learning not to listen to too many voices that tend to provide static which just interrupts true creativity. Art tools, one will come to appreciate are very personal. The real wisdom comes when you realize that you are truly making art for only one important critique and that is of course just YOU, the artist! 

Adding White Marks To Acrylic Paintings Using Chunky Sennelier Oil Pastel Crayons

This week I discovered chunky Sennelier Oil Pastel Crayons which Iam experimenting with on a  huge Acrylic painting I am doing. I have been very pleased with just how creamy the Sennelier Oil pastels are. Of course you probably know that all Oil pastels will smudge so you need to keep that in mind. On the other hand, you can disturb unwanted marks by rubbing off the marks or even painting over them. Especially when working on a very large painting, a big fat Oil Pastel crayon is a great product to have on hand.  The quality of the crayons is quite good as they should be at $10.00 a crayon! Lot's of colors to choose from. 

The artwork shown is work in progress.

Using Dried Up Paint Stained Rags When Making Mixed Media Art

Depending on my mood, sometimes I cart home a bag of rags I use in my studio and give them a washing with Oxiclean and they turn out just fine. Than on other occasions I have gotten so much gooked up paint on an old rag that I toss those nasty ones into the garbage....well not exactly. You see, in my studio the garbage might not get emptied in awhile and that is intentional. Because in the garbage may be some tossed out pieces of work that I might revive from the dead. Or as in the case of rags, I actually like what happens when I want to remove paint from a large painting I am working on and use a rag that is stiff and scratchy from layers of dried up paint. You get a lot of interesting swipes and marks when using a rag that has clumps and lumps of old paint on it.  

Adding A Stroke of White Pastel to Mixed Media Artwork Collage

If you often work by adding layers and layers of paper and product to your Mixed Media collage artwork, than you will be quite familiar with the feeling of being at the "end of your rope" when your piece just doesn't seem to work the way you would like. Sometimes, after a very industrious session in my studio when I have tried everything to resuscitate a piece, I find that adding a free wheeling white pastel marks or lines to the work is  just whst the Mixed Media collage doctor ordered. Just a little stroke of white does the trick. Since pastel is dry media that smudges, be sure to keep your hands off the work after you have added this element. On the other hand, if you do not love the addition of pastel marks, a damp paper towel can remove. 

Narrative in Mixed Media Abstract Art

Did you ever wonder how artists come up with the subject matter for their artwork? Which comes first a concept, a color scheme, a design or a story in your mind that yhou are trying to illustrate?  For many Abstract Mixed Media artists, the work evolves and the "content" establishes itself later. In this piece shown, I was loosely thinking about "salad". So yes, I did indeed mix several colors of "green" paint  and I did have an underlying concept going on in my brain. But for the majority of my work, the work dictates the narrative after the fact and each person who views the work, has their own intepretation of what they see. 

Creating Painted Papers For Mixed Media Collage Using A Painter's Putty Knife or Palette Knife

When I paint papers to use in Mixed Media collage, I use many tools and gadgets to create interesting textures and surfaces for my painted papers. A fun way to work is to apply paint with a painters putty knife of a palette knife. I have a very durable painter's knife that I picked up at a tag sale which has become one of my favorite tools. It is much stronger than some of the products out today, Try experimenting with applying one color at a time to your papers or see what happens when the putty knife picks up several colors in the process. After the painted papers dry, I am ready to tear them up and use in my next abstract collage.

In Mixed Media Collage: Don't Fall In Love With Your First Layer

It is not unusual for me to start off a collage in one palette and to end in a completley diffrent zone. During one of my recent sessions in my art studio, I was working in soft cream colors, only to leave the studio with an incomplete piece that ended with shades of aquamarine and dark blues. One thing is for sure, never fall in love with your first layer. And if there are papers that you really are keen on, don't use them in the early phases of your piece, because if you work like most of us, these pieces will eventually become buried with newer layers. I also have learned through the years not to be too careful when covering my support with the first layer. Just let it go....the piece will eventually emerge that wants to be found. 

Using Vintage Pottery Vases To Store Brushes, Art Tools and Materials In Your Art Studio

brushes.jpg

I like to use either vintage pottery vases or handmade studio pottery as containers in my Mixed Media art studio. Other artists may use empty glass jars or old coffee tins. Some artists seem to pay attention to the overall look of their studio, while others could care less and focus only on their work. I guess I fall into the category of wanting to "stage" even the supplies and storage containers I use. My favorite place to shop for "stuff" for my art studio is in junk shops or at flea markets. I usually spend under ten dollars for most of my pottery or ceramic vases. I picked up the vase shown because I adored the design pattern which mimics my own artwork which is inspired by Mid Century design. BTW, the white sculptural head shown as well, also came from a junk shop!